Setup FFF-SimpleExample
Now you have your SFTP connection setup we can upload the FFF-SimpleExample.
There are a few setup steps that need to be run through first. Be sure to read each step carefully. It may be worthwhile reading all steps first before following along. Get in touch with the tutors if you have any problems.
Table of Contents
Setup
1. Add Fat Free Framework (FFF)
- Go to the FFF Website
- Download the latest release
- In PHPStorm Create a Directory named
AboveWebRoot - Add copy the
fatfree-masterfolder to theAboveWebRootDirectory
2. Add FFF-SimpleExample
- First download the
FFF-SimpleExample.zip - moved the unzipped folder to your PHPStorm project folder.
- In
AboveWebRootcreate anautoloadfolder - move the
DatabaseConnection.phpin yourFFF-SimpleExample/autoloadtoAboveWebRoot/autoload
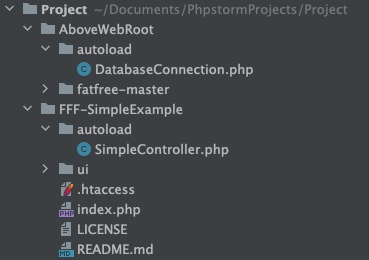
Your Project should now look like this:
3. Mapping folders
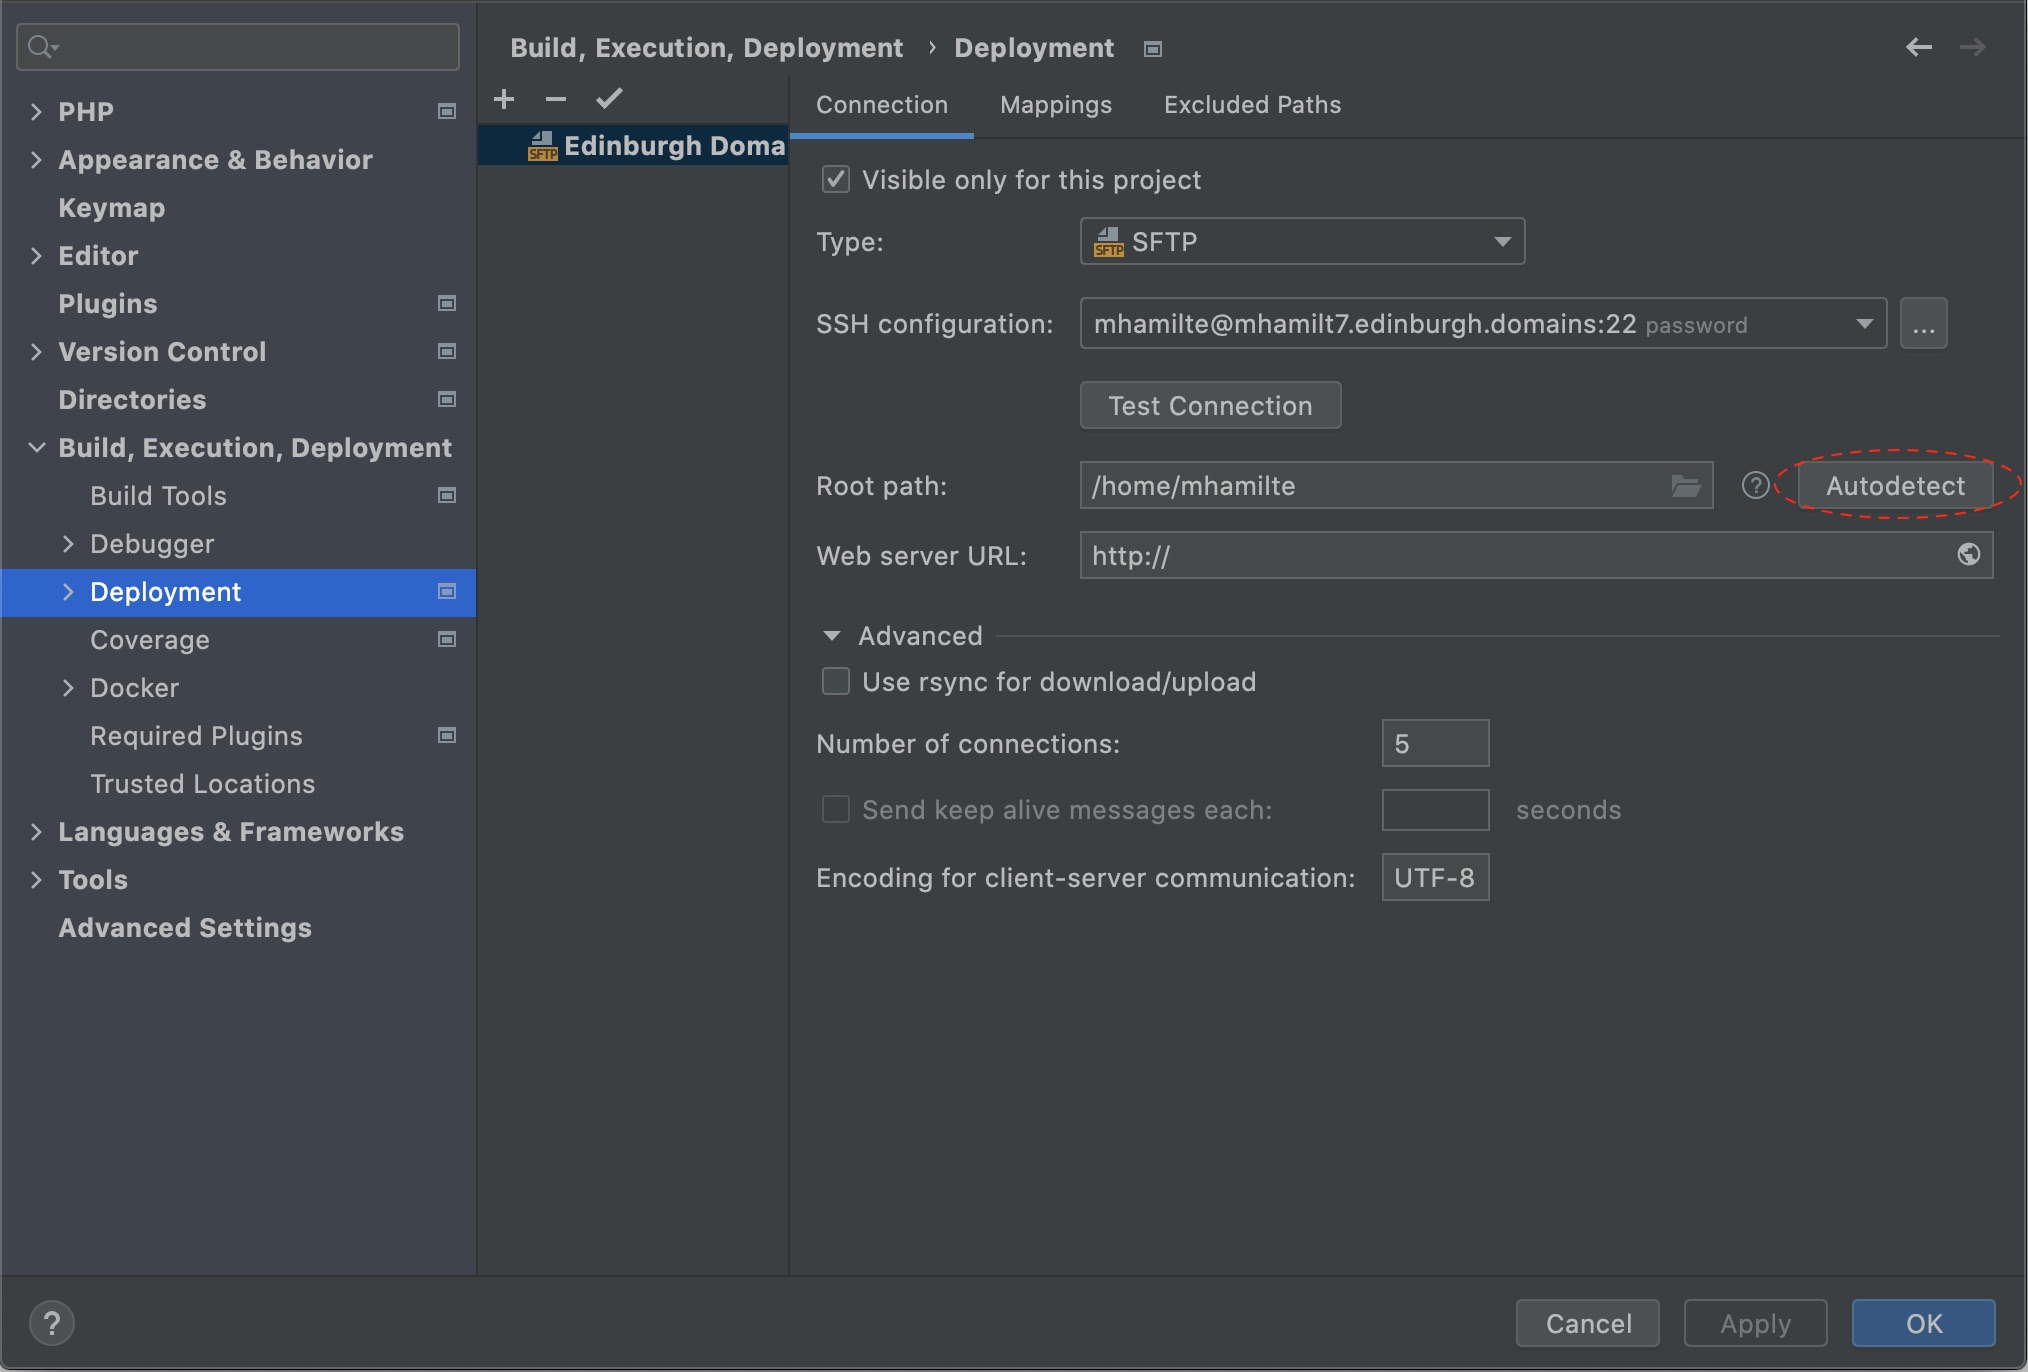
- Go to
Build, Execution, Deployment->Deployment, - Click Autodetect next to Root Path. This should set Root Path to:
/home/DOMAIN_USERNAME- You could now also set Web Server url:
https://YOUR_DOMAIN.edinburgh.domains.
- You could now also set Web Server url:
- go to the
Mappingstab and click Add New Mapping - Set a mapping for both
AboveWebRootandFFF-SimpleExample AboveWebRoot:- Local Path: click folder icon and select
AboveWebRoot - Deployment Path:
- right click the top level
- create a Directory named
AboveWebRoot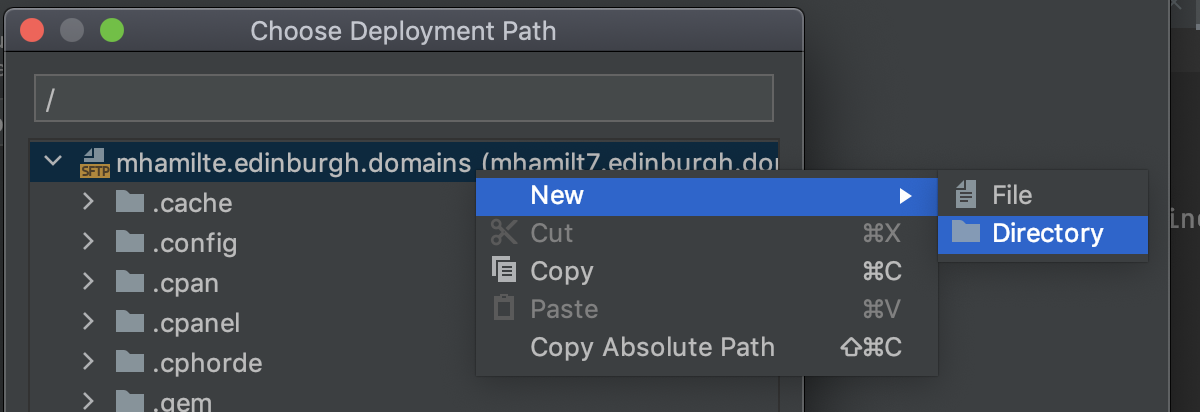
- Web Path:
/
- Local Path: click folder icon and select
FFF-SimpleExample- Local Path: click folder icon and select
FFF-SimpleExample - Deployment Path:
- right click the
public_html - create a Directory named
FFF-SimpleExample
- right click the
- Web Path:
/FFF-SimpleExample
- Local Path: click folder icon and select
-
Right click the project folder and select
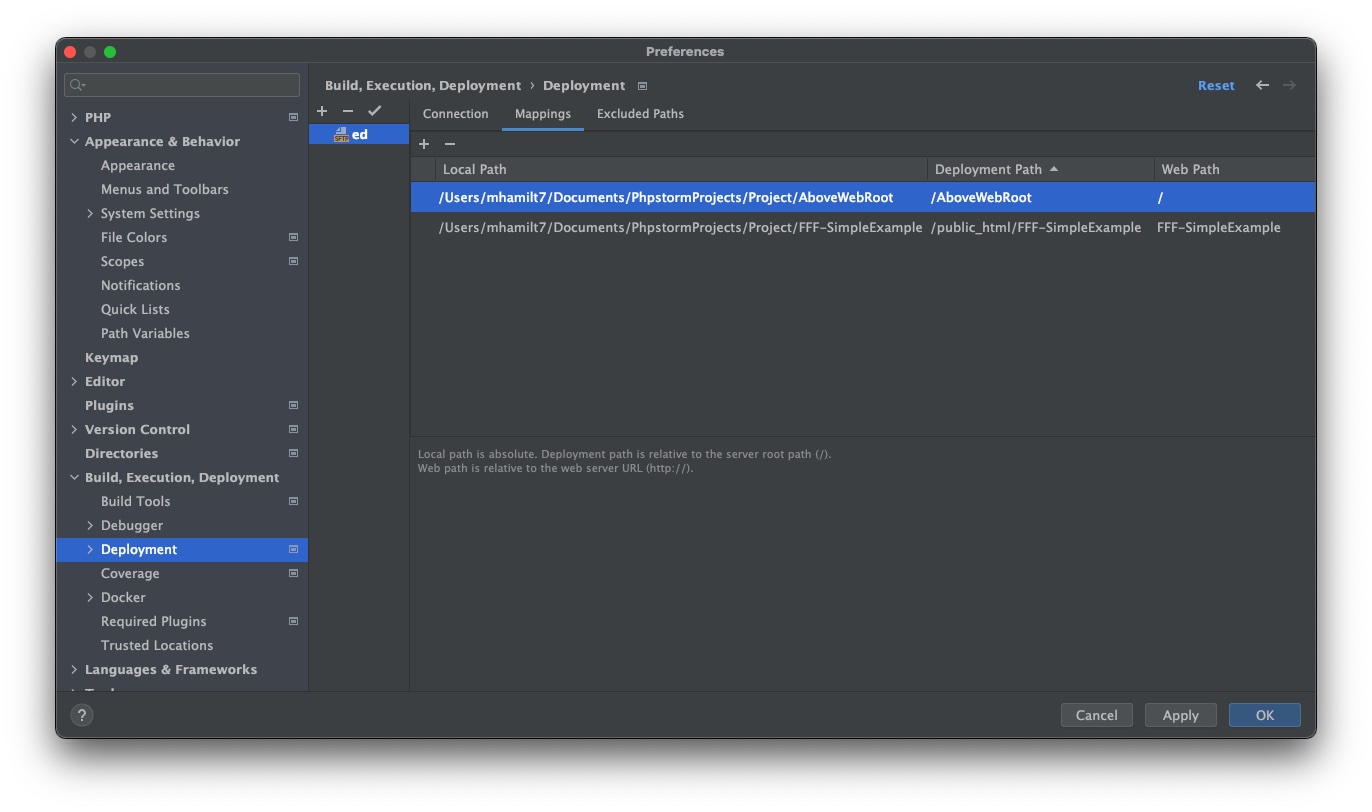
Deployment->Upload to YOUR_DOMAIN.edinburgh.domains - Your mappings should look something like:
4. DatabaseConnection Setup
4a. Create Database
- go to your edinburgh.domains dashboard
- go to MySQL® Databases
- Create a Database
- name the database
SimpleModel - click
Create Database
- name the database
- Add New User:
- just use the same username you have already e.g.
username_username - type a password
- click
Create User
- just use the same username you have already e.g.
- Add User to Database
- Your username should be the only one in the drop down.
- add this to the
username_SimpleModeldatabase -. clickAdd
4b. Create a table
- go to your edinburgh.domains dashboard
- go to phpMyAdmin
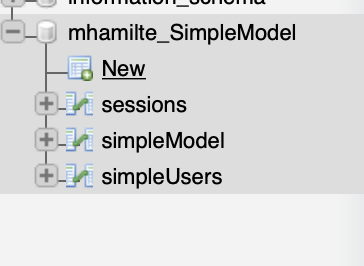
- Select your database
Username_DatabaseName - click
New
- add a new table named
simpleModelwith these columns - You will need to add an additional column

| Name | Type | Length/Values | Index | A_I |
|---|---|---|---|---|
| id | BIGINT | - | Primary | x |
| name | VARCHAR | 200 | - | - |
| colour | VARCHAR | 200 | - | - |
- you can leave other unmentioned attributes blank.
- when you check
A_IorPrimaryjust clickGoon the pop-up

- click
Save
4c. Set Authentication
- Go to
AboveWebRoot>autoload>DatabaseConnection.php - Fill in the missing details of the file by changing
USERNAME_DATABASENAMEUSERNAME_USERNAMEPASSWORD
class DatabaseConnection {

  static function connect() {
      return new DB\SQL(
      'mysql:host=localhost;port=3306;dbname=USERNAME_DATABASENAME',
      'USERNAME_USERNAME',
      'PASSWORD'
      );
  }

}
5. Upload to Server
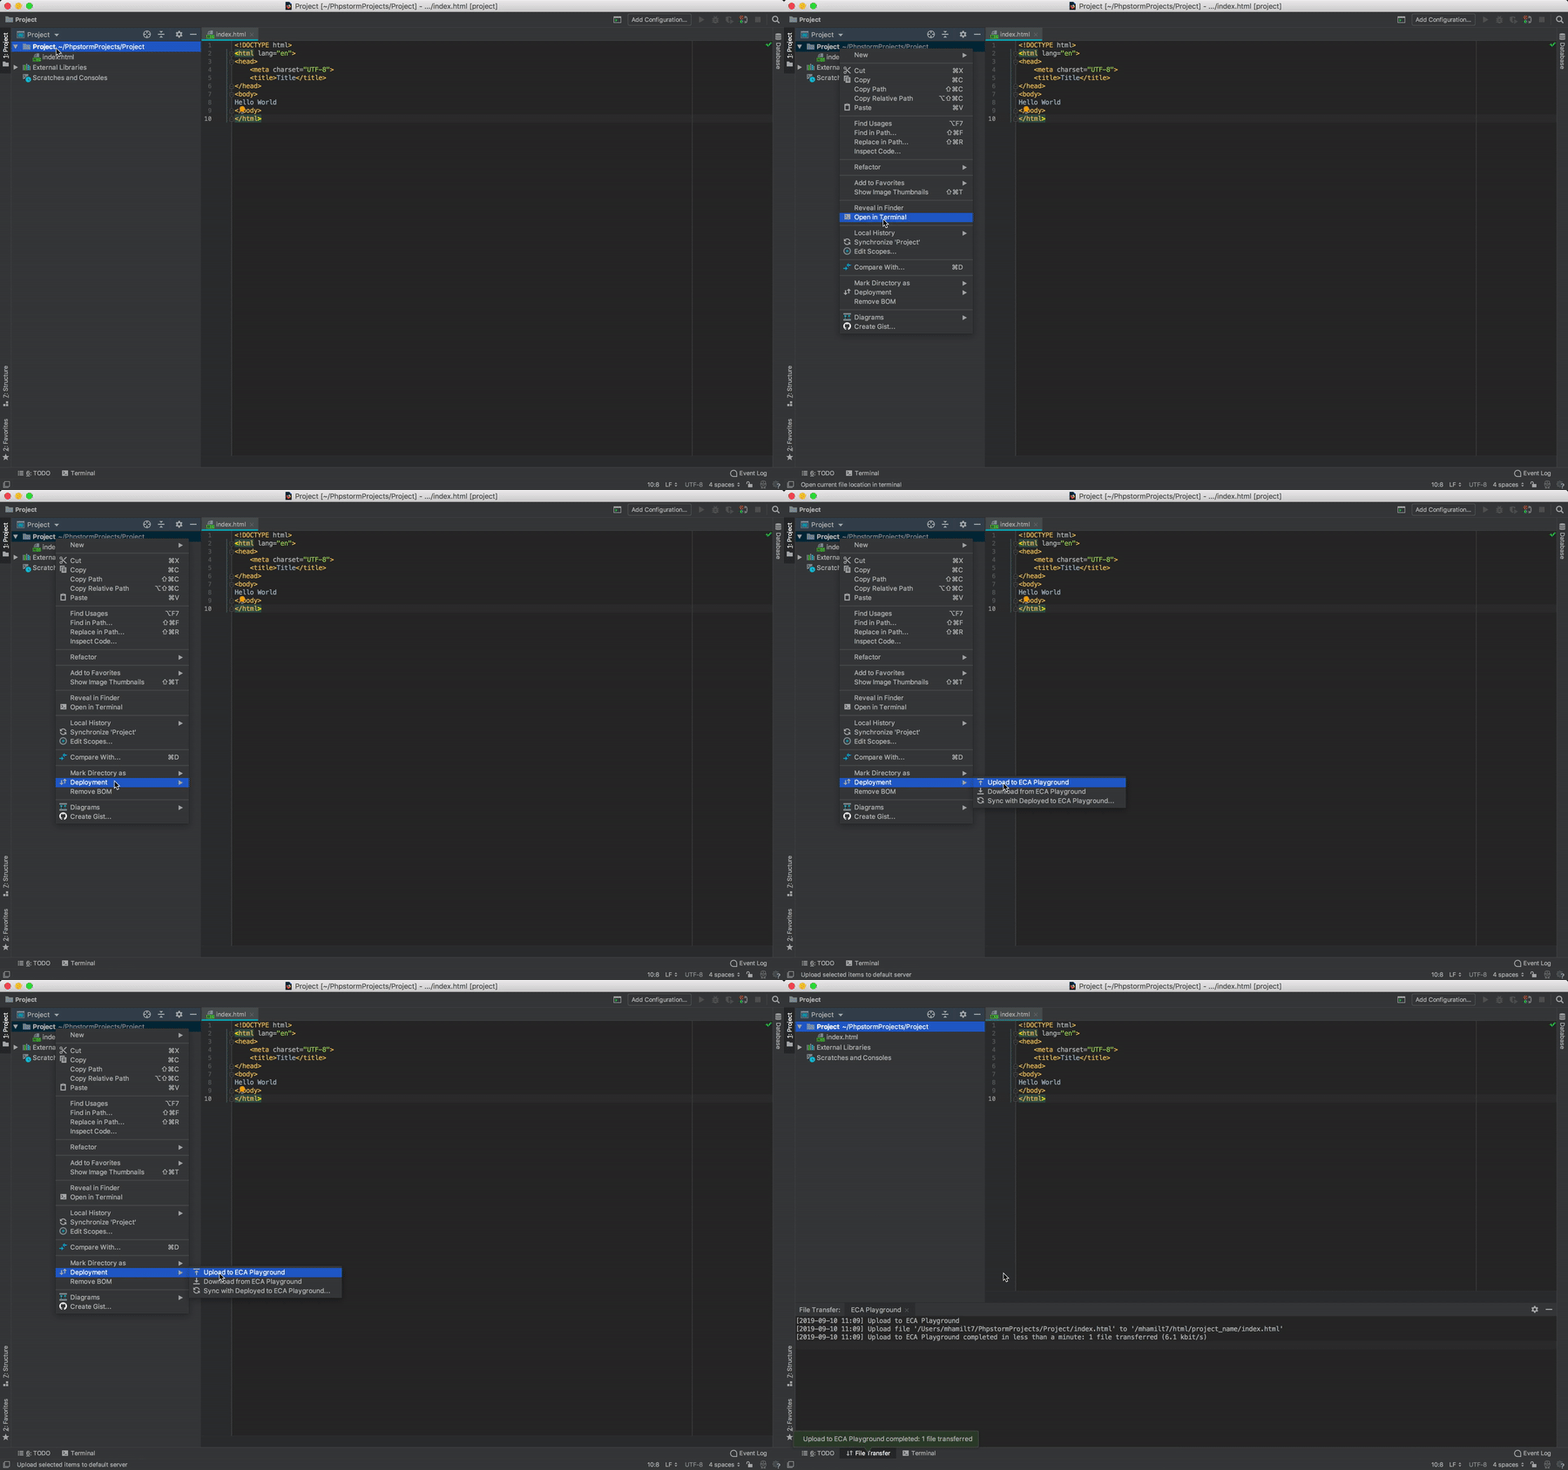
To upload all files in your project:
- Right click the project folder
Deployment->Upload to YOUR_DOMAIN.edinburgh.domains
Your site should now be available at YOUR_DOMAIN.edinburgh.domains/FFF-SimpleExample.
About the Example
Noted below are the parts of this project and which role within the MVC design pattern it concerns.
autoload/ [Role: Model / Controller]
autoload contains the SimpleController class that will usually be relevant for interacting with your MySQL Database.
Both the Model and the Controller will need to decide on how the SimpleController works.
index.php [Role: Controller]
index.php is where the routing on your site happens. Every request for a webpage on your site ends up here.
This is where the Controller will take data form the Model and send it to the View. It is also where data is collected
from the View and sent to the Model.
ui/ [Role: View / Controller]
The .html files within the ui/ folder are where your View decides on how pages are organised. Both View and
Controller will need to talk to each other to decide on how the site is templated and naming conventions for variables.
Every time you see {{ @A_Variable }}, the View and the Controller probably need to talk to each other.